Indiquez-nous le code erreur ou le problème rencontré
pour obtenir un diagnostic ou un devis de réparation.
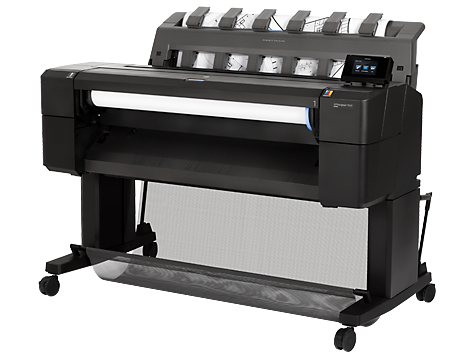
Codes erreur les plus fréquents - Traceur HP DESIGNJET T920, T920PS
Code Erreur 02.1:10 
Code Erreur 08:04 
Code Erreur 08:11 
Code Erreur 21:10 ou 21:13 ou 21.2:13 ou message Maintenance recommandée 
Code Erreur 47:01 ou 47:03 
Code Erreur 79:04 
Code Erreur 79.2:04 
Code Erreur 86:01 ou Vérifier chemin des têtes d'impression ou Vérifier chemin papier 
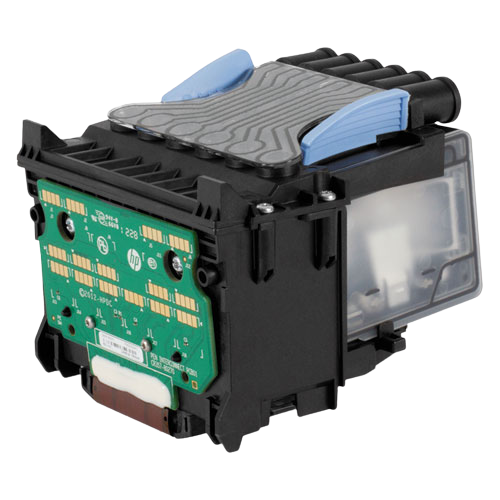
Message Repositionner la tête d'impression ou Remplacer la tête d'impression
Tableau de tous les codes erreurs - Traceur HP DESIGNJET T920, T920PS
- id :
977
- code :
01.0:10
- description :
Problem with the engine PCA
- remede :
Call agent: • Use the power switch at the rear to turn off the printer, then disconnect the power cord. Reconnect the power cord, then turn on the printer. Service engineer: • Replace the engine PCA. NOTE: If the 1.:1 is not solved after replacing the carriage PCA, or after replacing it a SE 2.1:1 code appears (carriage PCA), check the trailing cable to engine PCA connection; It's low probability, but possible, that a wrong connection could cause the damage to the carriage PCA and /
- id :
978
- code :
01.1:10
- description :
Error in the engine PCA
- remede :
Call agent: • Use the power switch at the rear to turn off the printer, then disconnect the power cord. Reconnect the power cord, then turn on the printer. Service engineer: • Replace the engine PCA. NOTE: If the 1.1:1 is not solved after replacing the carriage PCA, or after replacing it a SE 2.1:1 code appears (carriage PCA), check the trailing cable to engine PCA connection; It's low probability, but possible, that a wrong connection could cause the damage to the carriage PCA and /
- id :
979
- code :
01.2:10
- description :
Problem with the backup NVM
- remede :
Call agent: • Use the power switch at the rear to turn off the printer, then disconnect the power cord. Reconnect the power cord, then turn on the printer. Service engineer: 1. Check that the Encoder PCA Cable is correctly connected. 2. If the cable is correctly connected, replace the encoder PCA. NOTE: The backup NVM is located in the Paper Path Encoder PCA. In order to replace this part, you need to order the service kit CR357-679 " Motor Media Advance Transmission with Encoder&q
- id :
980
- code :
02.1:10
- description :
Problem with the carriage PCA
- remede :
Call agent: • Use the power switch at the rear to turn off the printer, then disconnect the power cord. Reconnect the power cord, then turn on the printer. Service engineer: 1. Check that the Trailing Cable is correctly connected between the Engine PCA and Carriage PCA. 2. Replace the carriage PCA. NOTE: If the 2.1:1 is not solved after replacing the carriage PCA or after replacing it a SE 1.:1 or SE 1.1:1 code appears (engine PCA), check the trailing cable connection to the engine PCA
- id :
981
- code :
03.2:10
- description :
Problem with the E-Box cooling fans
- remede :
Call agent: • Use the power switch at the rear to turn off the printer, then disconnect the power cord. Reconnect the power cord, then turn on the printer. Service engineer: 1. Check the fans to see which is not rotating by checking for airflow coming from the ebox; place a hand over the fan holes in the ebox underneath the printer to check for air coming from both fans. 2. Remove the E-Box (see Open the E-Box) open it, and check that the cable of the nonfunctional cooling fan is correctly c
- id :
982
- code :
05.1:10
- description :
Problems with the formatter FAN
- remede :
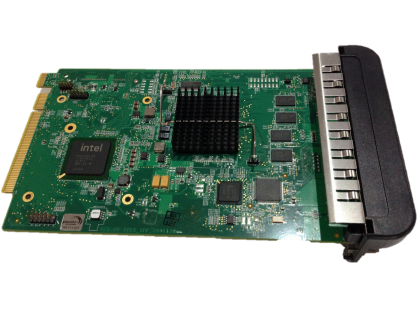
Call agent: • Use the power switch at the rear to turn off the printer, then disconnect the power cord. Reconnect the power cord, then turn on the printer. Service engineer: • Replace the formatter.
- id :
983
- code :
05.4:10
- description :
BIOS data corrupted in formatter
- remede :
Call agent: • Replace the formatter.
- id :
984
- code :
05.5:10
- description :
BIOS should be updated (advisory)
- remede :
Call agent: • Update the formatter BIOS.
- id :
985
- code :
05.7:10
- description :
- remede :
Call agent: 1. Disconnect any device connected to the USB host in the front panel. 2. Use the power switch at the rear to turn off the printer, then disconnect the power cord. Reconnect the power cord, then turn on the printer. Service engineer: 1. Replace the front panel. 2. If after replacing the hard disk in the front panel the SE continues to appear; replace the formatter PCA.
- id :
986
- code :
06.1:10
- description :
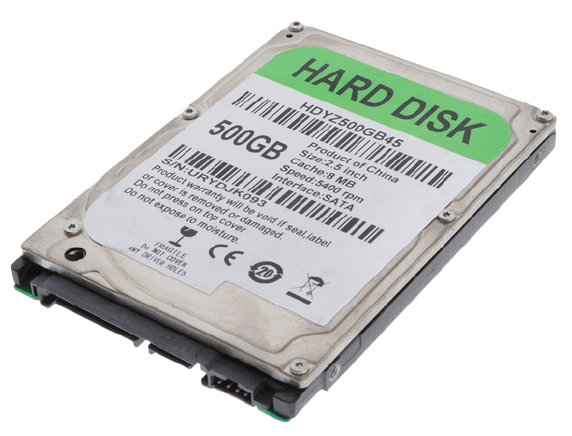
Hard disk not detected
- remede :
Call agent: • Use the power switch at the rear to turn off the printer, then disconnect the power cord. Reconnect the power cord, then turn on the printer. Service engineer: 1. Remove the E-Box (see Open the E-Box) open it, and check that the hard diskfs power and data cables are correctly connected. 2. Replace the hard disk drive. 3. If after replacing the hard disk in the front panel the SE continues to appear; replace the formatter PCA.
- id :
987
- code :
06.2:10
- description :
Hard disk cannot be unlocked
- remede :
Call agent: • Use the power switch at the rear to turn off the printer, then disconnect the power cord. Reconnect the power cord, then turn on the printer. Service engineer: 1. Remove the E-Box (see Open the E-Box) open it, and check that the hard diskfs power and data cables are correctly connected. 2. Replace the hard disk drive.
- id :
988
- code :
06.3:10
- description :
Hard disk is corrupted
- remede :
Call agent: • Use the power switch at the rear to turn off the printer, then disconnect the power cord. Reconnect the power cord, then turn on the printer. Service engineer: 1. Remove the E-Box (see Open the E-Box) open it, and check that the hard disk’s power and data cables are correctly connected. 2. Replace the hard disk drive.
- id :
989
- code :
06:03, 06:10
- description :
Problems with NVM in hard disk
- remede :
Call agent: • Use the power switch at the rear to turn off the printer, then disconnect the power cord. Reconnect the power cord, then turn on the printer. Service engineer: • Replace the hard disk drive.
- id :
990
- code :
08:04
- description :
Communication lost between front panel and formatter
- remede :
Call agent: 1. Restart the printer. 2. Update the firmware. Service engineer: 1. Check that the front panel is correctly connected. 2. Replace the front panel. 3. If after replacing the hard disk the SE continues to appear; replace the formatter PCA.
- id :
991
- code :
08:08
- description :
A front panel icon does not work (advisory)
- remede :
Service engineer: 1. Restart the printer. 2. Update the firmware.
- id :
992
- code :
08:10
- description :
Problems detected in the front panel Hardware
- remede :
Call agent: • Use the power switch at the rear to turn off the printer, then disconnect the power cord. Reconnect the power cord, then turn on the printer. Service engineer: 1. Check that the front panel is correctly connected. 2. Replace the front panel.
- id :
993
- code :
08:11
- description :
Communication lost between front panel and printer
- remede :
Call agent: 1. Restart the printer. 2. Update the firmware. Service engineer: 1. Check that the front panel is correctly connected. 2. Replace the front panel. 3. If after replacing the hard disk the SE continues to appear; replace the formatter PCA.
- id :
994
- code :
09:01
- description :
Media jam in Scanner
- remede :
Call agent: 1. Turn off the product using the power key at the front, then also turn off the power switchat the rear and disconnect the power cable. 2. There is a small lever at the rear left of the scanner. Slide the lever to the right and open the scanner cover. 3. Solve the media jam. 4. Check and clean the pressure rollers. 5. Close the scanner cover and gently push it down to lock it into place. 6. Reconnect the productfs power cable; turn on the power switch at the rear, and turn on th
- id :
995
- code :
09:01:10
- description :
Scanner Motor is failing
- remede :
Call agent: 1. Reboot the printer. 2. If system error persists, upgrade to the latest firmware. 3. Open the scanner cover. Underneath you will see red, then green, then blue flashing lights. 4. In the center of the scanner cover, between the flashing lights, you will find 4 small sensors labeled as R, G, B and L. Put your fingers over the R, G and B sensors simultaneously and the scanner motor should advance. Service engineer: 1. If there is no response from the scanner motor, replace the Eng
- id :
996
- code :
09:02
- description :
Scanner not calibrated
- remede :
• Calibrate the Scanner.
- id :
997
- code :
09:02:10
- description :
CIS A Element is failing
- remede :
Call agent: 1. Clean the scanner of dust and dirt and perform the Scanner Calibration. 2. If the system error persists, upgrade with latest firmware version. Service engineer: 1. Replace CIS A Element. 2. Replace Scanner Controller Board (SCU).
- id :
998
- code :
09:03
- description :
File I/O Error
- remede :
Call agent: 1. Reboot the product. 2. Upgrade to the latest firmware. 3. Go to Jobs > Options > Delete all queue scan jobs. 4. Make sure the hard disk that is installed in the printer is the correct one for the product you are repairing. 5. Check and clean scanner elements. 6. Calibrate the scanner. Service engineer: • In some corner cases, the issue could be related to media movement. Replace the media sensors.
- id :
999
- code :
09:03:10
- description :
CIS B Element is failing
- remede :
Call agent: 1. Clean the scanner of dust and dirt and perform the Scanner Calibration. 2. If the system error persists, upgrade with latest firmware version. Service engineer: 1. Replace CIS A Element. 2. Replace Scanner Controller Board (SCU).
- id :
1000
- code :
09:04
- description :
Library failed to load.
- remede :
Call agent: 1. Reboot the product. 2. Upgrade to the latest firmware.
- id :
1001
- code :
09:04:10
- description :
CIS C Element is failing
- remede :
Call agent: 1. Clean the scanner of dust and dirt and perform the Scanner Calibration. 2. If the system error persists, upgrade with latest firmware version. Service engineer: 1. Replace CIS A Element. 2. Replace Scanner Controller Board (SCU).
- id :
1002
- code :
09:05:10
- description :
CIS D Element is failing
- remede :
Call agent: 1. Clean the scanner of dust and dirt and perform the Scanner Calibration. 2. If the system error persists, upgrade with latest firmware version. Service engineer: 1. Replace CIS A Element. 2. Replace Scanner Controller Board (SCU).
- id :
1003
- code :
09:06:10
- description :
CIS E Element is failing
- remede :
Call agent: 1. Clean the scanner of dust and dirt and perform the Scanner Calibration. 2. If the system error persists, upgrade with latest firmware version. Service engineer: 1. Replace CIS A Element. 2. Replace Scanner Controller Board (SCU).
- id :
1004
- code :
09:08:11
- description :
Power cable of the Scanner is failing
- remede :
Service engineer: • Check the condition and connections of the Scanner Power cable, if necessary replace the cable.
- id :
1005
- code :
09:09:11
- description :
USB cable of the Scanner is failing
- remede :
Service engineer: • Check the condition of the Scanner USB cable and its connections, if necessary replace the cable.
- id :
1006
- code :
09:10:04
- description :
Scanner is in SAFE MODE
- remede :
Service engineer: • Restart the product, if the problem persists replace the SCU.
- id :
1007
- code :
09:10:10
- description :
Scanner Controller Board (SCU) is failing
- remede :
Call agent: 1. Turn off the product (2 sec.) using the Power key at the front, then also turn off the power switch at the rear and disconnect the power cable. 2. Perform the Scanner Calibration. 3. If t1. Replace the Scanner SCU. 2. Check the Scanner USB cable connection and the Power/Reset/Awake cable from the Scanner Controller Board to the Interconnect PCA; replace if broken. 3. Replace the Interconnect PCA.he system error persists, upgrade with latest firmware version. 4. Perform File Sy
- id :
1008
- code :
11:YZ
- description :
Trailing cable does not seem to be detected
- remede :
Call agent: • Use the power switch at the rear to turn off the printer, then disconnect the power cord. Reconnect the power cord, then turn on the printer. Service engineer: 1. Check that the trailing cable is correctly connected between the engine PCA and carriage PCA. 2. Check that the trailing cable connectors are not damaged, especially on the E-Box side; replace the trailing cable if necessary. 3. Check that the power cable from the power supply unit is connected to the formatter. 4. Re
- id :
1009
- code :
21.YZ
- description :
Failure moving service station
- remede :
Call agent: 1. Use the power switch at the rear to turn off the printer, then disconnect the power cord. Check the Primer Tubes. Reconnect the power cord, then turn on the printer. 2. Ensure that the service station path is clear. Remove any visible obstacles (screws, plastic parts, etc.) restricting the movement of the service station. 3. If the carriage has stopped over the service station, on the left of the printer, check that the cutter is not activated. The cutter may be blocking the ca
- id :
1010
- code :
21:13
- description :
Problem with the Service Station motor
- remede :
Call agent: 1. Ensure that the service station path is clear. Remove any visible obstacles (screws, plastic parts, etc.) restricting the movement of the service station. 2. If the carriage has stopped over the service station, on the left of the printer, check that the cutter is not activated. The cutter may be blocking the carriage over the service station, preventing the service station from moving correctly. The cutter is on the right side of the carriage. 3. Perform the service station di
- id :
1011
- code :
22.0:00
- description :
Service-station-side ink supply station error
- remede :
Call agent: 1. Use the power switch at the rear to turn off the printer, then disconnect the power cord. Reconnect the power cord, then turn on the printer. 2. Perform the ink delivery system diagnostic test to troubleshoot the problem further. Service engineer: 1. Check that the cables between the ink supply station and the engine PCA are not damaged and are properly connected. In case of any damage, replace the cable. 2. Replace the ink supply station on the service station side. 3. Replace
- id :
1012
- code :
22.1:00
- description :
Front-panel-side ink supply station error
- remede :
Call agent: 1. Use the power switch at the rear to turn off the printer, then disconnect the power cord. Reconnect the power cord, then turn on the printer. 2. Perform the ink delivery system diagnostic test to troubleshoot the problem further. Service engineer: 1. Check that the cables between the ink supply station and the engine PCA are not damaged and are properly connected. In case of any damage, replace the cable. 2. Replace the ink supply station on the front panel side. 3. Replace the
- id :
1013
- code :
24:10
- description :
Error detected in ink tube system
- remede :
Call agent: • Use the power switch at the rear to turn off the printer, then disconnect the power cord. Reconnect the power cord, then turn on the printer. Service engineer: 1. Perform the Ink Delivery System diagnostic test in order to check that the bongos (pushers) go up and down to pressurize ink in the tube, and the Out of Ink sensors work properly. 2. If the diagnostic test does not find any problem, install new cartridges,and the printhead, and try purging the Ink Supply Tubes again.
- id :
1014
- code :
26:01
- description :
Ink supply error found during IDS diagnostic test (advisory)
- remede :
In the front panel message you can see letters representing the names of the colors of the faulty supplies. Call agent: 1. Reseat the faulty ink supply and repeat the ink delivery system diagnostic test. 2. Replace the faulty ink supply and repeat the ink delivery system diagnostic test. Service engineer: • Replace the left ink supply station.
- id :
1015
- code :
41:03
- description :
Electrical problem (fault, current limit, overheating) in paper-axis motor
- remede :
Call agent: 1. Use the power switch at the rear to turn off the printer, then disconnect the power cord. Reconnect the power cord, then turn on the printer. 2. Check for any visible obstacles restricting the movement of the paper advance roller. If there is a wrinkled mass of paper inside the paper path, lift the pinchwheels (using the pinchwheels diagnostic test), and clear the obstruction. 3. Perform the paper drive diagnostic test to troubleshoot the problem further. Service engineer: 1. C
- id :
1016
- code :
42:03
- description :
Electrical problem (fault, current limit, overheating) in scan-axis motor
- remede :
Call agent: 1. Use the power switch at the rear to turn off the printer, then disconnect the power cord. 2. Reconnect the power cord, then turn on the printer. 3. Check for any visible obstacles restricting the movement of the carriage assembly. Remove any obstacle to let the carriage move freely along the whole scan axis. Service engineer: 1. Check that the scan-axis motor cable is undamaged and correctly corrected to the engine PCA. 2. Replace the scan-axis motor. 3. Replace the engine PCA.
- id :
1017
- code :
45.1:03, 45.1:10
- description :
Error in the rewinder 1 system (upper rewinder)
- remede :
Call agent: 1. Use the power switch at the rear to turn off the printer, then disconnect the power cord. Remove the paper from roll 1. Reconnect the power cord, then turn on the printer. 2. Perform the rewinder diagnostic test to troubleshoot the problem further. Service engineer: 1. Check that the rewinder 1 cable is undamaged and correctly connected to the engine PCA. 2. Replace the upper roll.
- id :
1018
- code :
45.2:03, 45.2:10
- description :
Error in the rewinder 2 system (lower rewinder)
- remede :
Call agent: 1. Use the power switch at the rear to turn off the printer, then disconnect the power cord. Remove the paper from roll 2. Reconnect the power cord, then turn on the printer. 2. Perform the rewinder diagnostic test to troubleshoot the problem further. Service engineer: 1. Check that the rewinder 2 cable is undamaged and correctly connected to the engine PCA 2. Replace the lower roll.
- id :
1019
- code :
46.1:10
- description :
Error in the upper pump of the PHA blowing system
- remede :
Call agent: • Use the power switch at the rear to turn off the printer, then disconnect the power cord. Reconnect the power cord, then turn on the printer. Service engineer: 1. Check that the pump cable is undamaged and correctly corrected to the engine PCA. 2. Replace the upper pump.
- id :
1020
- code :
46.2:10
- description :
Error in the lower pump of the PHA blowing system
- remede :
Call agent: • Use the power switch at the rear to turn off the printer, then disconnect the power cord. Reconnect the power cord, then turn on the printer. Service engineer: 1. Check that the pump cable is undamaged and correctly corrected to the engine PCA. 2. Replace the lower pump.
- id :
1021
- code :
47.5:10
- description :
Problem at the starwheel lifter motor end of the travel sensor
- remede :
Call agent: 1. Use the power switch at the rear to turn off the printer, then disconnect the power cord. Reconnect the power cord, then turn on the printer. 2. Check for any visible obstacles restricting the movement of the starwheel assembly, then clear the obstruction. 3. Perform the scan-axis starwheel diagnostic test to troubleshoot the problem further. Service engineer: 1. Check that the starwheel lifter sensor cable is undamaged and correctly connected to the engine PCA. 2. Replace the
- id :
1022
- code :
47:03, 47:10
- description :
Starwheel motor error
- remede :
Call agent: 1. Use the power switch at the rear to turn off the printer, then disconnect the power cord. Reconnect the power cord, then turn on the printer. 2. Check for any visible obstacles restricting the movement of the starwheel assembly, then clear the obstruction. 3. Perform the scan-axis starwheel diagnostic test to troubleshoot the problem further. Service engineer: 1. Check that the starwheel assembly cable is undamaged and correctly corrected to the engine PCA. 2. Replace the starw
- id :
1023
- code :
47:10
- description :
Starwheel motor error
- remede :
Call agent: 1. Use the power switch at the rear to turn off the printer, then disconnect the power cord. Reconnect the power cord, then turn on the printer. 2. Check for any visible obstacles restricting the movement of the starwheel assembly, then clear the obstruction. Service engineer: 1. Check that the starwheel assembly cable is undamaged and correctly corrected to the engine PCA. 2. Perform the scan-axis starwheel diagnostic test to troubleshoot the problem further. 3. Replace the starw
- id :
1024
- code :
48:00
- description :
PPS system failure
- remede :
Call agent: 1. Use the power switch at the rear to turn off the printer, then disconnect the power cord. Reconnect the power cord, then turn on the printer. 2. Perform the scan-axis PPS diagnostic test to troubleshoot the problem further. Service engineer: 1. Check that the printhead-to-paper space (PPS) solenoid cable is undamaged and correctly connected to the engine PCA. 2. Replace the printhead-to-paper space solenoid.. 3. Replace the engine PCA.
- id :
1025
- code :
52:10
- description :
Drop detector failure
- remede :
Call agent: • Use the power switch at the rear to turn off the printer, then disconnect the power cord. Reconnect the power cord, then turn on the printer. Service engineer: 1. Check that the drop detector cable is undamaged and correctly connected to the service station board. 2. Replace the drop detector. 3. Replace the service station.
- id :
1026
- code :
54.4:03
- description :
Pinchwheel lifter motor error
- remede :
Call agent: 1. Use the power switch at the rear to turn off the printer, then disconnect the power cord. Reconnect the power cord, then turn on the printer. 2. Check for any visible obstacles restricting the movement of the pinchwheel assembly, then clear the obstruction. Service engineer: 1. Check that the pinchwheel motor assembly cable is undamaged and correctly connected to the engine PCA. 2. Replace the pinchwheel lifter motor. 3. Replace the engine PCA.
- id :
1027
- code :
55:10
- description :
Cannot access the line sensor EEPROM
- remede :
Call agent: 1. Use the power switch at the rear to turn off the printer, then disconnect the power cord. Reconnect the power cord, then turn on the printer. 2. Perform the carriage test to troubleshoot the problem further. Service engineer: 1. Replace the line sensor. 2. Replace the carriage PCA.
- id :
1028
- code :
56:01
- description :
Drive roller analog encoder homing failed
- remede :
Call agent: 1. Use the power switch at the rear to turn off the printer, then disconnect the power cord. Reconnect the power cord, then turn on the printer. 2. Perform the paper path test to troubleshoot the problem further. Service engineer: 1. Replace the encoder disk and encoder sensor. 2. Replace the engine PCA.
- id :
1029
- code :
59.1:09
- description :
Two electrical parts have been replaced at the same time
- remede :
Service engineer: • Replace one part at a time, and restart the printer before replacing another.
- id :
1030
- code :
59.2:00
- description :
An unsupported or reused part has been installed
- remede :
Service engineer: • Install only new parts recommended by HP for this printer.
- id :
1031
- code :
59.3:10
- description :
Wrong information stored on CryptoAsic
- remede :
Call agent: • Switch the power off at the rear of the printer, wait two minutes, then switch it back on again. Service engineer: • Escalate the case to Level 3, requesting new CryptoAsic SIM licenses. Update the CryptoAsic SIM with the delivered licenses.
- id :
1032
- code :
59.4:10
- description :
CryptoAsic failure
- remede :
Call agent: • Switch the power off at the rear of the printer, wait two minutes, then switch it back on again. Service engineer: 1. Order an Engine Daughter PCA Service Kit. Escalate to Level 3 providing printer Serial Number, Product Number, and the serial number of the Engine Daughter PCA Service Kit. Replace the Engine Daughter PCA. Write in an empty USB the file provided by Level 3. Plug the USB in the printer and reboot. If booting fails, enable diagnostic package with the USB and provi
- id :
1033
- code :
59.5:19
- description :
CryptoAsic type mismatch
- remede :
Call agent: • Switch the power off at the rear of the printer, wait two minutes, then switch it back on again. Service engineer: 1. Order an Engine Daughter PCA Service Kit. Escalate to Level 3 providing printer Serial Number, Product Number, and the serial number of the Engine Daughter PCA Service Kit. Replace the Engine Daughter PCA. Write in an empty USB the file provided by Level 3. Plug the USB in the printer and reboot. If booting fails, enable diagnostic package with the USB and provi
- id :
1034
- code :
59.6:19
- description :
Printer serial number mismatch
- remede :
Call agent: • Switch the power off at the rear of the printer, wait two minutes, then switch it back on again. Service engineer: 1. Order an Engine Daughter PCA Service Kit. Escalate to Level 3 providing printer Serial Number, Product Number, and the serial number of the Engine Daughter PCA Service Kit. Replace the Engine Daughter PCA. Write in an empty USB the file provided by Level 3. Plug the USB in the printer and reboot. If booting fails, enable diagnostic package with the USB and provi
- id :
1035
- code :
59.7:14
- description :
CryptoAsic generic error
- remede :
Call agent: • Switch the power off at the rear of the printer, wait two minutes, then switch it back on again. Service engineer: • Order an Engine Daughter PCA Service Kit. Escalate to Level 3 providing printer Serial Number, Product Number, and the serial number of the Engine Daughter PCA Service Kit. Replace the Engine Daughter PCA. Write in an empty USB the file provided by Level 3. Plug the USB in the printer and reboot. If booting fails, enable diagnostic package with the USB and provi
- id :
1036
- code :
60.1:11
- description :
Initialization error (cannot read RFID tag)
- remede :
Call agent: 1. Switch the power off at the rear of the printer, wait two minutes, then switch it back on again. 2. Check the power cord; try connecting it to another power socket. Service engineer: 1. Check that the RFID device is correctly connected. 2. If the error persists, get the printer log (see Appendix C: Obtaining the printer log and the diagnostics package) and contact Level 3 providing print Serial Number and Product Number.
- id :
1037
- code :
60.2:17
- description :
Initialization error (RFID has incorrect data)
- remede :
Call agent: 1. Switch the power off at the rear of the printer, wait two minutes, then switch it back on again. 2. Check the power cord; try connecting it to another power socket. Service engineer: 1. Check that the RFID device is correctly connected. 2. If the error persists, get the printer log (see Appendix C: Obtaining the printer log and the diagnostics package) and contact Level 3 providing print Serial Number and Product Number.
- id :
1038
- code :
61:01
- description :
Incorrect or unsupported file format (advisory)
- remede :
Call agent: 1. Check whether the printer supports the file format. Formats such as PS, PDF, TIFF, and JPEG are supported by PostScript printers only. 2. Use the power switch at the rear to turn off the printer, then disconnect the power cord. Reconnect the power cord, then turn on the printer. 3. Check the printer’s graphic language setting (see the user's guide). 4. Resend the file to the printer. 5. Update the firmware.
- id :
1039
- code :
61:04.1
- description :
PostScript fonts seem to be missing (advisory)
- remede :
Call agent: • Update the firmware to re-install the fonts.
- id :
1040
- code :
61:04.2
- description :
Unknown PostScript ID sent to printer (advisory)
- remede :
Call agent: • Update the firmware.
- id :
1041
- code :
61:08
- description :
Incorrect paper type specified in job (advisory)
- remede :
Call agent: • Change the paper type and resend the job.
- id :
1042
- code :
61:08.1
- description :
Job cannot be printed because it is password-protected (advisory)
- remede :
Call agent: • Resend the job without password protection.
- id :
1043
- code :
61:08.2
- description :
Job contains format errors or incorrect settings (advisory)
- remede :
Call agent: 1. Ensure that the file format sent is supported by the printer. 2. Resend the job using the Embedded Web Server.
- id :
1044
- code :
61:09
- description :
Unexpected end of job (advisory)
- remede :
Call agent: 1. Resend the job. 2. Resend the job using the Embedded Web Server.
- id :
1045
- code :
61:10
- description :
Job timed out (advisory)
- remede :
A slow computer processing complex files can pause for longer than the default printer timeout, in which case some elements of the job may be lost. Call agent: 1. Increase the I/O timeout using the printer's front panel (see 'Configure network settings' in the user’s guide). 2. Resend the job from a faster computer. 3. Resend the job using the Embedded Web Server. 4. Use the “print to file” option in the driver and copy the resulting file to a USB flash drive. Print from the USB flash drive.
- id :
1046
- code :
63:04
- description :
Network interface error
- remede :
Call agent: 1. Use the power switch at the rear to turn off the printer, then disconnect the power cord. Reconnect the power cord, then turn on the printer. 2. Check that the network cable is correctly connected to the network interface. 3. Update the firmware. Service engineer: 1. If the printer is blocked showing the system error persistently; check that the network interface card (including the riser) are correctly connected. 2. If the printer is blocked showing the system error persistent
- id :
1047
- code :
63:10
- description :
Network interface error
- remede :
Call agent: 1. Use the power switch at the rear to turn off the printer, then disconnect the power cord. Reconnect the power cord, then turn on the printer. 2. Check that the network cable is correctly connected to the network interface. 3. Update the firmware. Service engineer: 1. Check that the network interface card (including the riser) are correctly connected. 2. Replace the network interface card.
- id :
1048
- code :
63:20
- description :
Potential problem in the network interface (advisory)
- remede :
Call agent: 1. Use the power switch at the rear to turn off the printer, then disconnect the power cord. Reconnect the power cord, then turn on the printer. 2. Check that the network cable is correctly connected to the network interface. 3. Update the firmware. Service engineer: 1. Check that the network interface card (including the riser) are correctly connected. 2. Replace the network interface card.
- id :
1049
- code :
71:03
- description :
Out of memory
- remede :
Call agent: 1. Use the power switch at the rear to turn off the printer, then disconnect the power cord. Reconnect the power cord, then turn on the printer. 2. Resend the job with one or more of the following changes: • Decrease resolution to 3 dpi. • Select Economode print mode. • Select the Send job as bitmap option.
- id :
1050
- code :
71:08
- description :
Insufficient display list
- remede :
Call agent: 1. Use the power switch at the rear to turn off the printer, then disconnect the power cord. Reconnect the power cord, then turn on the printer. 2. Resend the job with one or more of the following changes: • Decrease resolution to 3 dpi. • Select Economode print mode. • Select the Send job as bitmap option.
- id :
1051
- code :
72.02
- description :
A service calibration should be performed (advisory)
- remede :
Call agent: • To find out which service calibration to perform, print the calibration status. At the front panel, press , then , then Internal prints > Service information prints > Print calibration status. Perform whichever calibration is needed.
- id :
1052
- code :
74.08:04
- description :
Firmware update problem
- remede :
Call agent: 1. Use the power switch at the rear to turn off the printer, then disconnect the power cord. Reconnect the power cord, then turn on the printer. 2. Try again to update the firmware. If necessary, see Appendix B: Updating firmware in diagnostics boot mode. 3. Download the firmware file again, as the file that you have may be corrupted. Service engineer: • Replace the front panel.
- id :
1053
- code :
74.1:04
- description :
Error uploading paper preset (advisory)
- remede :
Call agent: 1. Use the power switch at the rear to turn off the printer, then disconnect the power cord. Reconnect the power cord, then turn on the printer. 2. Ensure that the connection between the computer and the printer is functioning properly. 3. Try again to upload the paper preset. 4. Ensure that the version of the paper preset is compatible with the firmware version in the printer. You can check this on the same Web page from which you downloaded the paper preset.
- id :
1054
- code :
74:01
- description :
Error uploading firmware update file (advisory)
- remede :
Call agent: 1. Use the power switch at the rear to turn off the printer, then disconnect the power cord. Reconnect the power cord, then turn on the printer. 2. Ensure that the connection between the computer and the printer is functioning properly. 3. Try again to upload the firmware update file.
- id :
1055
- code :
76:03
- description :
The hard disk is full
- remede :
Call agent: 1. Remove any unnecessary files from the hard disk using the Embedded Web Server. 2. Run the Hard Disk Recovery Utility.
- id :
1056
- code :
78.1:04
- description :
Paper settings area missing in paper settings file (advisory)
- remede :
Call agent: 1. Use the power switch at the rear to turn off the printer, then disconnect the power cord. Reconnect the power cord, then turn on the printer. 2. Update the firmware.
- id :
1057
- code :
78:08
- description :
Paper does not support borderless printing (advisory)
- remede :
Call agent: • Use a paper type that supports borderless printing. NOTE: This should be resolved by the customer without assistance.
- id :
1058
- code :
79.2:04
- description :
Generic Operating System error
- remede :
Call agent: 1. Use the power switch at the rear to turn off the printer, then disconnect the power cord. Reconnect the power cord, then turn on the printer. 2. Update the firmware. 3. See Appendix A: How to troubleshoot system error 79:4. 4. Information available by pressing while viewing the system error screen; or, preferably, provide the printer log.
- id :
1059
- code :
79:03
- description :
Generic firmware error
- remede :
Call agent: 1. Use the power switch at the rear to turn off the printer, then disconnect the power cord. Reconnect the power cord, then turn on the printer. 2. Update the firmware. 3. Information available by pressing while viewing the system error screen; or, preferably, provide the printer log.
- id :
1060
- code :
79:04
- description :
Generic firmware error
- remede :
Call agent: 1. Use the power switch at the rear to turn off the printer, then disconnect the power cord. Reconnect the power cord, then turn on the printer. 2. Update the firmware. 3. See Appendix A: How to troubleshoot system error 79:4. 4. Information available by pressing while viewing the system error screen; or, preferably, provide the printer log.
- id :
1061
- code :
80:03
- description :
Stacker overdrive motor error
- remede :
Call agent: 1. Use the power switch at the rear to turn off the printer, then disconnect the power cord. Reconnect the power cord, then turn on the printer. 2. Test the cutter. Perform a 'Form Feed & Cut', and verify the paper can be cut. 3. Perform the stacker overdrive motor diagnostic test to troubleshoot the problem further. 4. Reconnect the power cord, then turn on the printer. 5. Perform the stacker overdrive motor diagnostic test to troubleshoot the problem further. Service enginee
- id :
1062
- code :
81:01
- description :
Paper servo shutdown, possible paper jam
- remede :
If this error is reported during printer setup, it may indicate that the printer has been dropped during transportation, causing structural damage. Before continuing with the 81:1 troubleshooting, first look for structural damage. To identify the structural damage, look for the following three things: • Consistent 81:1 error codes • Platen fingers rubbing on the roller surface, leaving black marks on the roller • A gap in the platen beam. If there is any gap in the vertical direction bet
- id :
1063
- code :
86:01
- description :
Scan axis servo shutdown, possible paper jam
- remede :
Call agent: 1. Open the window and check for any visible obstacles restricting the movement of the carriage assembly. If there is a wrinkled mass of paper inside the paper path, lift the pinchwheels and clear the obstruction. 2. Turn off the printer and unplug the power cord. Try to move the carriage manually. Check that the cutter disengages correctly and that the carriage is not blocked by the service station. 3. Perform the scan-axis diagnostic to obtain further information on the problem.
- id :
1064
- code :
87:01
- description :
Problem reading the scan-axis encoder (advisory)
- remede :
Call agent: 1. Use the power switch at the rear to turn off the printer, then disconnect the power cord. Reconnect the power cord, then turn on the printer. 2. Ensure that the encoder strip is clean. If it is dirty, clean it, paying special attention to the area near the service station. 3. Replace the carriage PCA.
- id :
1065
- code :
89:03
- description :
Stacker ramps motor error
- remede :
Call agent: 1. Use the power switch at the rear to turn off the printer, then disconnect the power cord. Remove all paper from the stacker and basket. Reconnect the power cord, then turn on the printer. 2. Perform the stacker ramps motor diagnostic test to troubleshoot the problem further. Service engineer: 1. Check that the stacker ramps motor cable is undamaged and correctly connected to the engine PCA. 2. Replace the stacker ramps motor.
- id :
1066
- code :
90:03
- description :
Diverter valves motor error
- remede :
Call agent: 1. Use the power switch at the rear to turn off the printer, then disconnect the power cord. Remove all paper from the stacker and basket. Reconnect the power cord, then turn on the printer. 2. Perform the output valve test to troubleshoot the problem further. 3. Perform the output valves calibration to check system performance, and troubleshoot further. Service engineer: 1. Check that the diverter valves motor cable is undamaged and correctly connected to the engine PCA. 2. Repla

